The windshield is getting ready for the fiberglass fairing that will surround it and provide a lip that the slider will sit under for weather seal. I have cut the strips of fiberglass for the front but still need to do the top part with both fiberglass and carbon fiber. I will be using carbon fiber for two of the layers to add extra strength to the lip in case somebody accidentally pulls themselves up using the lip.
I also got to do some flying this weekend. Jeff organized a "last of summer" hurrah of 5 RV's (two RV-7's, one RV-8, one RV-4 and on Harmon Rocket) and we flew up to Friday Harbor for lunch. Of course no trip to Friday Harbor is complete without some ice cream so we had that too before we made the trek back to the airport to fly home. On the way home we had some great flying weather so we did lots of interesting flying. We started with some formation flying followed by some extended trail flying. The extended trail was a lot of fun because its essentially follow the leader in the air. We were on our way to Snoqualmie when we did this so the scenery was spectacular. I took a ton of pictures with Jeff's camera so I don't have any to post here but Jeff promises he will post them on his blog. We followed that up with a couple of trails of smoke over Snoqualmie and then some close trail which is a very close trail formation that had some very cool views. I really hope I can get some of those pictures soon. (EDIT: I linked a couple of pictures from Jeffs website below)
Lots happening right now in the aviation part of my life including a couple of friends who did their first flight in the past month. One guy flew his RV-9A (same airplane I am building) this month and ended up with a "heavy" wing. That means that the airplane wants to slightly turn all the time in one direction as if that wing was heavier than the other. He troubleshot the cause down to a slightly twisted right flap so he borrowed mine to see if that solved the problem, and it did! So now part of my airplane has already flown. :-)
Anyway enough chat, on with the show!
 |
| Sunday evening status picture. |
 |
| Started working on the windshield fairing this week. Here you can see where I have sanded the excess Sikaflex glue from around the edges. I also taped off the glass and put a green band of electrical tape where the edge of the fairing will be. Then I roughed up the plexi so that the epoxy would stick nicely and then I put a layer of epoxy and flocking down. |
 |
| Here it is after I had finished the epoxy and flox. I don't think I mixed the the flox into the epoxy well enough because it came out somewhat lumpy, or maybe it was a result of the black pigment I put into the mixture but in any case I put a second coat of epoxy and micro (microscopic glass beads) to smooth things up after I had sanded it down to make sure there were no air voids. |
 |
| Moving on to the cowling I managed to get the quarter turn fasteners installed on the lower cowl in this picture. |
 |
| Part of the process of installing quarter turn fasteners requires some kind of backing be attached to the lower cowl for the receptacles. There are two options, one is to install an aluminum strip similar to what I did on the firewall. The other is what I opted to do and that is to lay up a nice fiberglass lip. This required me to rough up the lower cowling along this horizontal seam and then apply two coats of mold release to the top cowling. Then I mated both halves together using scrap aluminum and cleco's (I have a few holes to fill in the cowl now). Once the outside edges were flush I layed up five layers of 3" glass "tape" and applied it to the seam between top and bottom cowl. In this picture you see the result after the epoxy had hardened and I had separated the two halves. The black line is where I later went in and trimmed the "flange" to the size I wanted it. |
 |
| Here you can see the new flange after I had trimmed the edges and drilled the holes for the quarter turn receptacles. I needed some soft rivets to install the receptacles so I stopped at Spencer (Thun Field) and picked up an ounce of them. I have to say I really like the look of the flange. Not only does the top cowl fit like a glove but I don't have to worry about puckering that some people have when they try to use the aluminum strip. |
 |
| Here you can see the top cowling after I installed the quarter turn fasteners. Still have to wait until the receptacles are installed before I can start working on the big cooling air rings and the forward section of the cowling. |
 |
| Here are the strips of fiberglass that will be used for the windshield fairing that goes around the front and sides. The strips start at a half inch wide and go up to two inches a quarter of an inch at a time. |
 |
| See that space between the openings on either side of the propeller opening? That's the space I need to lay up two more fiberglass flanges that will allow me to use a platenut (an attached nut essentially) and screw to hold the front of the cowling together. |
 |
| A little hard to get perspective on this picture but I took a picture of the inside of the seam between the two cowling halves. The quarter turn receptacles are installed in the fiberglass flange you saw earlier and the cowling is fastened together off of the airplane (for more work). In this picture you are looking at the inside of cowling through the propeller opening. |
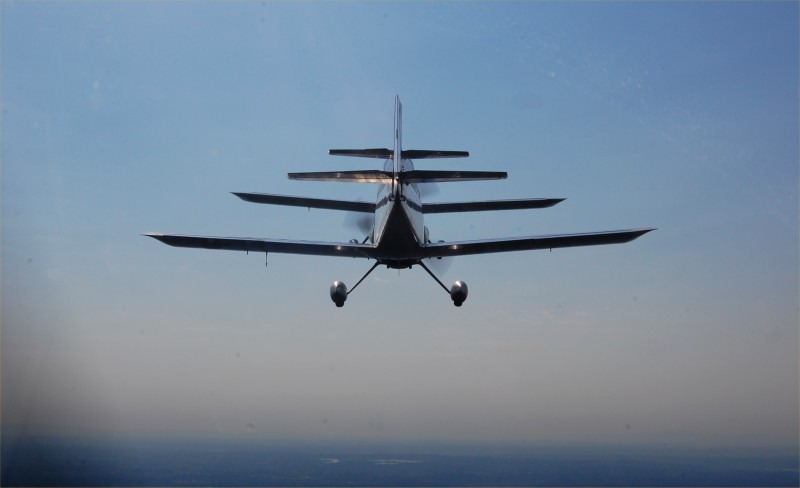 |
| Close trail picture. There are actually two planes ahead of us in this picture but it looks like a one with lots of wings! |
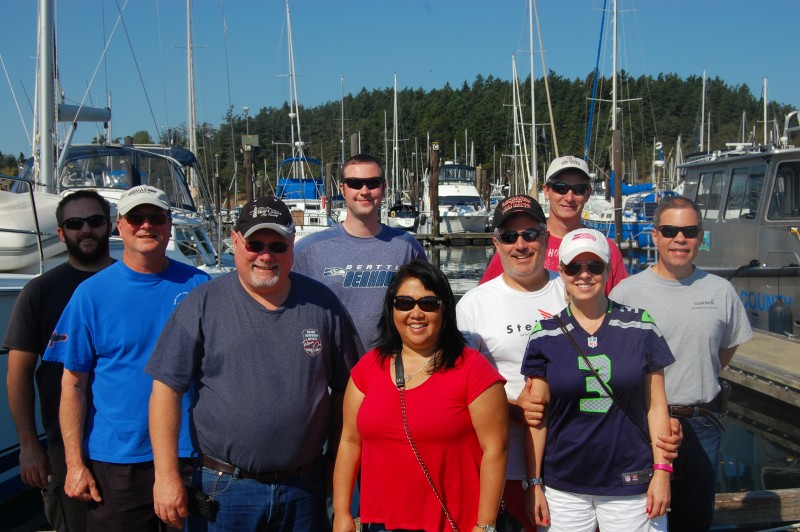 |
| Here is the group picture we took on the docks at Friday Harbor. |