Sunday, August 26, 2018

Wings go to storage

I know its only been a few days since my last post but today was a big day in that it marked a shift in the build process.  Today Harry and Ben helped me load up my completed wings, drive them to the airport, and then Harry and Martin helped me unload them for storage in the hangar.  I still have a little fiberglass work to do as well as a few final assembly tasks such as riveting the pitot tube mast in but for now they are done.  Yaah hooo.

Here is a quick time-lapse video taken from one of our front security camera's.

https://video.nest.com/clip/eac13db2c2ee4d57a93d0bc739292f80.mp4


Wing tip attachment hinges riveted to the wings.  This was the last step I needed to complete before putting the wings in storage until final assembly.  

Not an everyday sight.  The wings had to be removed from the cradle so we could load the cradle into the back of my truck.  Here I laid a few blankets down on the driveway and then gently set the wings on the blankets.  Such an unusual sight that I had to take a picture.

Loaded and ready to go!  Thanks Harry and Ben!

Finally the wings in their storage location....my hangar.  You can see the 9's wingtip on the right side if you know what you are looking at.

Wednesday, August 22, 2018

Aileron actuation

Its been a busy couple of weeks since my last post but a lot has happened...not all of it RV related.  ;-)

However, what is RV related is posted below and includes completion of the aileron actuation linkages as well as the start of the wing tip work.  For the wing tips I opted to use the hinge method of attachment that I used on the RV-9A.  It looks great and seems to hold up very well.

With the RV-10 the aileron linkages are a little more complicated due to the added row of seats.  In the picture here you see the torque tubes and associated bell-cranks that get employed to transition the forward location of the control sticks to aft of the wing spars.

Here is the bell-crank that converts the left to right motion of the stick to an up/down motion that moves the ailerons.

Using the hinge method of attaching the wing tips requires almost double the amount of rivets compared to screws.  In this picture you can see that I am using a rivet fan to space the holes out evenly.

Another view of the rivet fan in use.

After trimming the wing tip to size I was able to get it taped, drilled and cleco'd in place for this picture.  Still lots of work left before this is complete.

Sunday, August 5, 2018

Geez....any more "flapping" and I'm going to be airborne

This week was again all about the flaps.  I finished up the left flap early in the week and the right flap on Saturday.  Both turned out great as you can see in the pictures below.  Sunday was spent working on the control systems (Aileron Actuation).  The system in the 10 is much more complex due to the location of the ailerons in relation to the pilot.  Since the control sticks sit forward of the spar there are a series of bellcranks that get installed to transmit the side to side stick motion aft of the spar.

I really like the new way of doing the trailing edges of the long flaps.  As you have seen in pictures I went out and purchases two 10' square steel tubes that are about 2" on a side.  These are quite heavy and the surface was surprisingly smooth.  I was able to lay both of them on my work bench, use a level to make sure they are "flat" and then assemble and rivet the flaps on top.

As an added bonus the two square steel tubes will be used to build the fuselage cart when it comes time to build one.  :-)

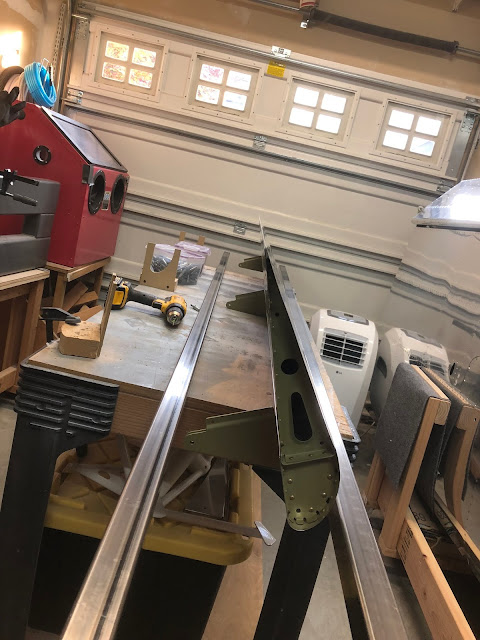
Two items of note in the picture.  The first is you can see the two steel square tubes I mentioned above.  If you look close you can even see where the rivet manufacturer heads where driven on the bar to the right of the photo.  The second and main reason I took the picture is you can see how straight the flap trailing edge came out using this method.

Another view of the finished left flap.  Also notice the portable air conditioner sitting in the background...its been hot here this past couple of weeks!  The garage is on the South West side of the house so the sun beats on it all day long and without full insulation it gets warm!
Both flaps installed on the wings.


Another view of the wings with the flaps installed.  Its getting pretty tight in the work shop right now!
Aileron actuation parts.