Wednesday, May 29, 2013

Wings and things

The past few days have been pretty busy in the Anderson hangar. In my last post I had just finished up the inventory and was getting the wing stand built.  Well, the stand is complete and I have started working on both the main spars and the trailing edge spars.  Oh, and it should be noted that Amy can once again get her car into the garage....she can't get out of the car but it will fit in there now.  :-)

Main spars sitting on the bench ready for the first round of countersinking for rivets and plate-nuts.
Tie down brackets tapped with threads that will accept a tie down ring.  Don't want the airplane flying when I'm not in it!

Twin wing stand with main spars sitting on it.  See the RV 9A drawing hanging up above?  :-)


Spars sitting on edge while I installed the tie down brackets

Tie down bracket installed but not torqued

Lining up the doubler plates for drilling.  I am finding that its very challenging to work with a set of plans that only shows the left wing.  I have to reverse them in my mind for the right wing.


The instructions say to cut the doubler plate (mounted below the spar) to match the hole in the spar itself.  Its an oblong hole so I used this bit to get the majority of the material removed and then I used the dremel bit seen in the next picture to match them up nicely.


Rear spar parts all de-burred and ready to be assembled for match drilling and final drilling.

Saturday, May 25, 2013

Aurora we have a problem

While the inventory went very well I did find one problem, or at least I think its a problem.  One of the parts identified in the inventory (see picture below) was pretty gouged up in multiple locations.  I am putting some pictures up here and I will call Van's on Tuesday to see if they are going to have to send me another one.  Oddly enough both pieces had damage.  One was much worse than the other but both were still damaged.

The damaged part.  The 9'10" angle.

Deep scrape/gouge


Hangar transformation and Inventory

The past couple of days have been pretty uneventful from a building perspective but I have been busy. I've rearranged the hangar a bit to give me more room to work on the wings (both at the same time), and today I finally got to open the new wing kit.  Wow, what a bunch of parts to inventory.  I think the Empennage kit had about 3 pages of parts where as the wing kit had 7.  Pictures pretty much tell the story.
Finally unscrewed and opened the lids!  What a box of paper?  Amy would like it but...

Ok, I guess there are wing parts in there.

After removing the paper wrapping this is where the inventory starts.


And this is what the inventoried parts look like.

Had to add a second row of Rivet holders.  I sure hope I don't have to drive all those rivets!

The space that I had to make available to start the wing stands.

Monday, May 20, 2013

My time estimation sux

Here it is Monday night and my last post said I would be working on the wings by now.  Well, I still haven't opened the crates yet but I am getting close.  The last few days have been kinda slow while I worked on the elevators.  After inspecting the work of the elevators and the trim tab and finding them safe for operation I did manage to finish up the right elevator and I finished up the left elevator with the exception of the trim tab.  That's where the problem lies.  I have read so many other builders stories about how the trim tab was the most problematic that I have decided to take it reaaaaaly slow and read every account I could find on how people completed the task successfully.  Many of the blogs, in fact probably the majority have had issues and had to re-order the trim tab components.  Van's even has a special line item purchase because there are so many people messing this up.  I don't want to be one of those people and knock on wood I think I am past the worst of it.  I've done all the bending of the trailing edge and the ends.  I have have drilled out the hinge, riveted the spar to the bottom of the trim tab, and now I am ready to Proseal (glue) the foam inserts into the tab and move on.  We shall see how it all ends but so far I am hopeful.

right elevator completed. Here you can see how strait the trailing edge came out.  Perfect!

Left elevator all buttoned up except for the trim tab which goes in that little indent in the trailing edge.

This is a picture of me using my inspection camera to view the rivets inside the elevator as I was bucking them.  This little camera on a stick was a gift from Amy that has come in VERY handy numerous times.

Here is a view of me inserting the camera into the leading edge where the work is being done.  If you look closely you can see the "bucking bar on a stick" sticking out from the channel. Square tube.
Here you see the trim tab after I had riveted the spar to the bottom of the skin.  I point this out because I was able to use the longeron yoke for my squeezer to reach inside and squeeze these rivets rather than use a traditional bucking bar and risk damaging the top skin.  The longeron yoke is the black "C" shaped end on my pneumatic rivet squeezer sitting on the bottom of the picture.

another shot of the tab with the spar riveted in.

The final storage place for the elevators with the right elevator already hung.

Thursday, May 16, 2013

Phase 2 started today

No pictures to show today but I did make the trek down to Van's in Aurora Oregon to pick up my wing kit.  Left bright and early this morning, had a nice traffic free drive both down and up and was back home having lunch with Amy by 1:30 pm.  Amy, with her super human strength, was able to help me unload the trailer.  These boxes are large and heavy, in the range of 300 lbs and 15 feet long for one of them.  The other is shorter but wider and deeper so it was a fun challenge to get them unloaded.

Short of that, I was able to finish up the deburring, dimpling and priming of the left elevator with the remaining time in the evening.  I was outside priming as I watch some dark thunder bumpers roll in so I pushed a little hard to get the primer on the pieces and then get them back in the garage before the skies opened up.

Finally, I re-arranged the shop a little because Amy is having one of two garage sales tomorrow so I had to convert the hanger back into a garage, or at least part of it.

So, starting this weekend I will officially be on phase two, the wings.  How long do you think it will take me?  I am planning for at least 6 months but it may take longer.

Tuesday, May 14, 2013

Lots of elevators today

Today I spent some time getting the right elevator ready for final epoxy on the trailing edge.  This required me to insert the AEX wedge, clamp the two skins together, and then drill the holes perpendicular to the elevator cord line.  Vans very  thoughtfully included a diagram that allowed me to cut a small wooden block that I used as a guide for drilling these holes.  You can see that block and me drilling the holes in the pictures below.

Match drilling trailing edge with templated block.

Ready to epoxy the trailing edge

Starting on the left elevator.  This one is harder because of the trim tab.
My semi-clever idea for holding the AEX wedge at the correct angle for machine counter-sinking.  I used the AEX wedge from the practice kit and glued it to this block with a backing board.

Sunday, May 12, 2013

Workin' on the weekend

So it seems it's been a few days since I posted and I have lots to catch up on (not as much as I would like but still progress).  Since returning from North Carolina last week I have had a little time to finish up the rudder, work on the right elevator, and try out my new HVLP gun.  Lets start with the HVLP gun.  My cousin Dave does a little auto touch-up painting and during my annual golf trip to MT I chatted with him about my less than acceptable results thus far while priming my various parts.  His recommendation was to purchase a quality HVLP gun.  I've seen other RV'ers that have used cheaper guns and got acceptable results so either I suck (entirely possible) or their standards were lower than mine.  Anyway, I purchased a good quality HVLP gun and got a chance to use it yesterday.  Holy Cow!  What a difference.  The primer went on smooth and clean with no runs.  I am astounded.  There are a couple of pics below showing the results although you can't really see the difference in the photo's.

Right elevator spar and rib parts

Right elevator stiffeners

Next up on the agenda is the Rudder.  I finished it this weekend up to the point of adding the fiberglass tips and that wont happen until I am in final assembly of the empennage.  I don't think I mentioned it but just before I left to go to NC I epoxied the training edge together using an aluminum angle.  Yesterday I finished up the process of riveting the trailing edge.  I followed Van's suggestions but I also alternated rivet direction for every other rivet.  I'm not sure if that helps or not but the final product came out nice.  It's not perfectly strait but the bow is so minute it is not visible unless you put a long strait edge up to it.  Well within the limits set by Van's.  One major worry behind me.
rudder trailing edge cleco'd to aluminum angle

My clever way of holding the two skins apart so I can slide the pieces together without getting epoxy all over everything

Nice strait trailing edge sitting while the epoxy sets up.  I let it sit for about a week before removing the cleco's

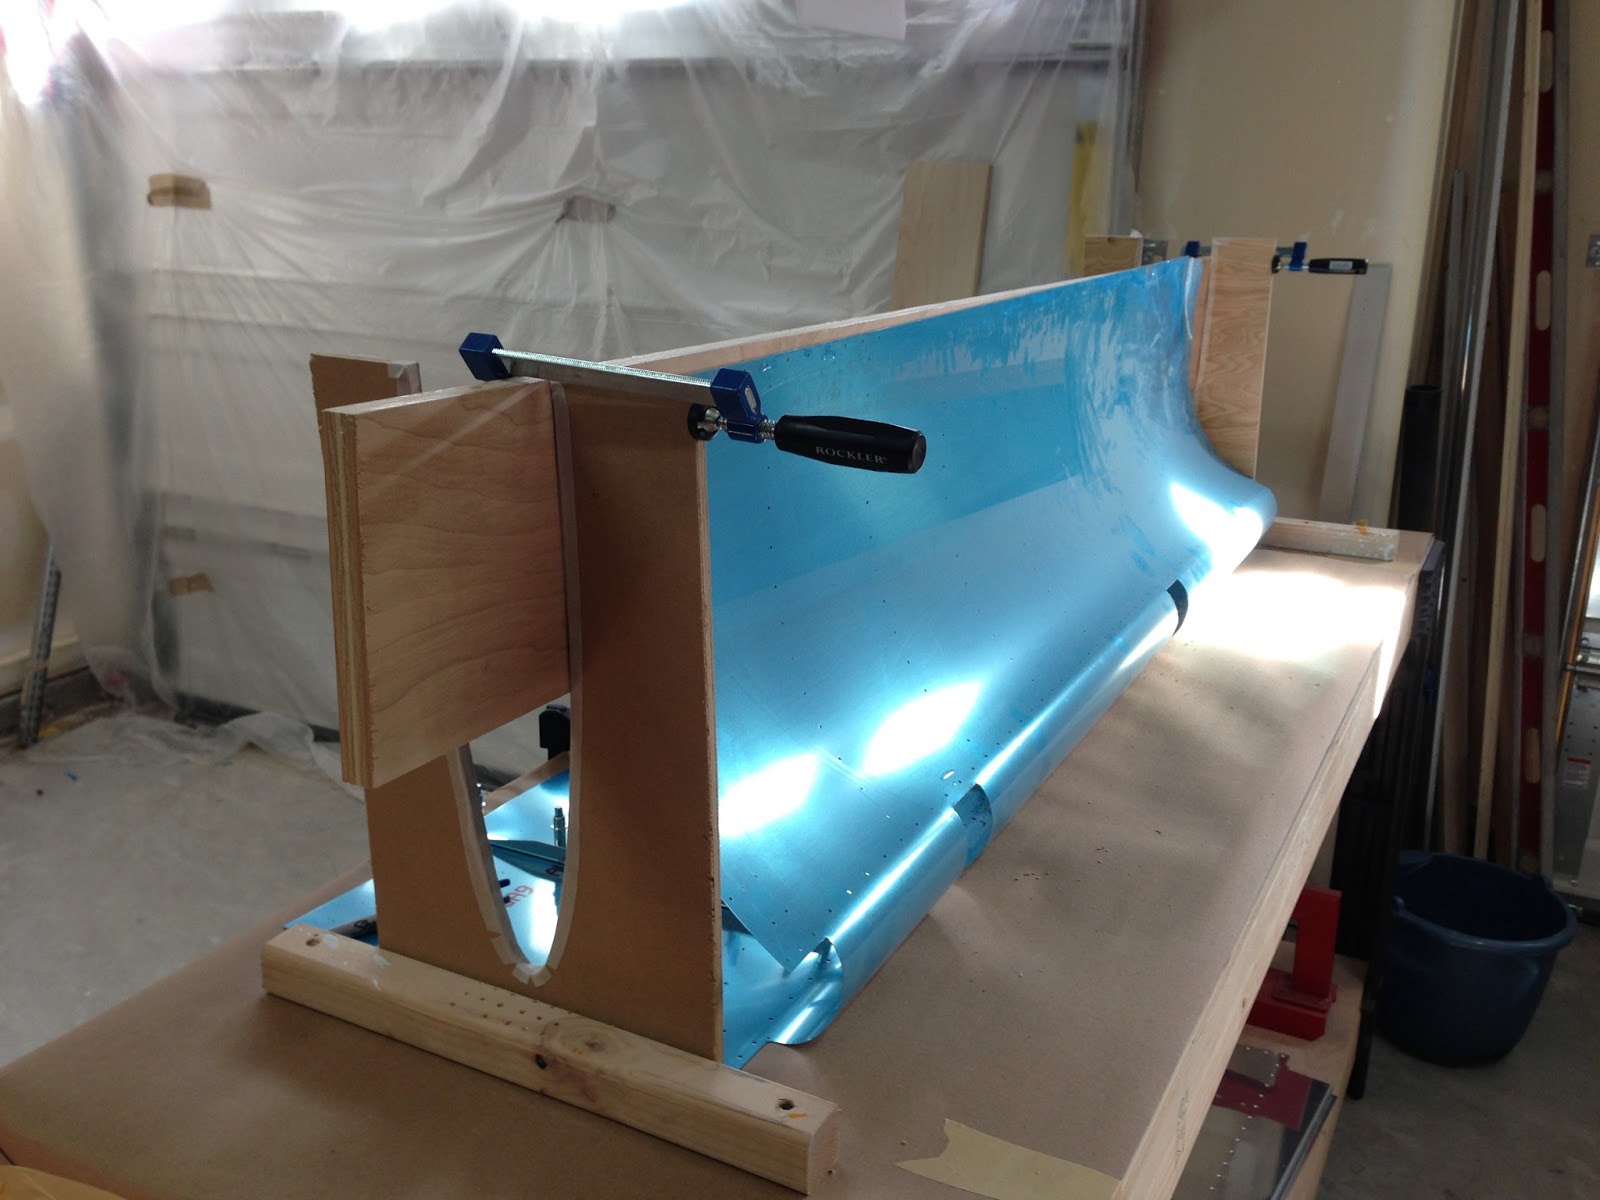
Rudder leading edge with the round bar taped to the low half.  This allows me to put a bend in the aluminum that allows me to cleco and rivet the two halves together as in the picture below.

leading edge all cleco'd and ready for riveting.  I did straiten up the edge so it didnt have that wave before I riveted it.

The final product ready for storage.

Finally, the rest of my time this weekend has been consumed by the right elevator.  Lots of time spent dimpling, deburring, drilling, and priming as noted above.  I was hoping to get to the point where I epoxy the trailing edge but I just ran out of time.

Thursday I go to Aurora to pick up the wing kit.  I'm excited and a little hesitant to get started on the wing.  Its a big project and I have to do pretty much the same thing twice (2 wings) but mirrored.  Oh well there have been many wings completed by other folks and most of them survived...

Saturday, May 4, 2013

I though dimples were cute...until now

Today I spent the majority of the day in the garage hangar working on two items.  First I dimpled both elevator skins and their associated stiffeners.  That took about 2 hours because I used my pop rivet dimpler to do both skins.  It seems to do such a nice job of creating consistent dimples and the space available just doesn't make it easy to use the long arm dimpler.  I am very happy with the results but it did take longer than normal.

using my pop rivet dimpler to dimple the elevator skins

I ran out of AN4-3 rivets.  I have to order more and this will help remind me to put it in when I get them.


After finishing up the elevator dimpling I moved on to the rudder assembly.  For some reason I thought I was about done with the rudder, but here it is 8 pm in the evening and I am still not done.  I am close.  I am ready to epoxy the trailing edge and let it sit while I am out of town this week.  By the time I get back it should be ready for the riveting.  I guess I will find out if its as hard as they say to get and keep a strait trailing edge.

I will say I goofed twice today.  I riveted the bottom of the rudder without installing the fairing attach strips.  So, I had to drill out about 20 rivets and re-install them with the strips in place.  I also got my first chance to use the blind rivets (pop rivets) that are beveled.  In the picture below you can see how narrow the trailing edge gets, well I couldn't get a bucking bar in there, nor could I get my squeezer in there.  So, Van's conveniently includes the option to use the blind rivets.  They came out pretty good.

The other goof was when I riveted the counter balance rib to the wrong side of the spar.  Drilled out two rivets and put it in correctly.  Sometime it seems no matter how many times I look at the plans I miss things.
Angle cleco'd on and ready for epoxy tomorrow morning

Rudder mostly assembled and riveted.  Waiting on trailing edge.

Its miller time...well I guess that Coors light time since that's all I have.  :-)

Thursday, May 2, 2013

Report card time

Tonight I had my first "inspection" by a tech advisor.  Brian Lee took some time to stop by after his normal work day to inspect my work and answer any questions.  I think it went really well and we had a great discussion.  After about an hour he wrote up the report, gave me a copy and went his way.  He was very complimentary about my work which is really nice to see.  While he was here I had to take the vertical stabilizer down from its storage location so I decided to take a picture of it complete.
The completed vertical stabilizer.

My first tech counselor visit report.

Wednesday, May 1, 2013

Busy busy busy

Yep, its been a while since I posted anything new so I guess its time.  I've managed to get a few tasks done in the past 10 days in addition to all my travels.  First up, I finished riveting the vertical stabilizer together.  In the picture below you can see where I am slowly making my way around with rivets.  I did run into one problem that took a little thought to solve.  When I put the forward spar in and riveted it in place I failed to removed the blue plastic protective cover from the inside of the skin.  After a few minutes of thought I finally come up with the idea of removing the top rib, stuffing a broom handle down into the opening, wrapping the plastic skin around the broom handle and then twisting my way down until all of the plastic was removed.  It worked wonderfully and to top things off I ended up putting better rivets back into the top rib!

Next up was the Rudder.  I don't have any pictures of the rudder itself being built because all I have done so far (except the skins I talked about in a previous post) is prepare and prime the skeleton of the rudder.  I am waiting until my EAA technical advisor has a chance to look at my work before I button it all up.  So in the mean time I started working on the elevators.  The left elevator is suppose to be one of the hardest parts of the entire empennage kit.  I will have to do lots of reading before I start work on the trim tab which is the offending part of the left elevator. 

In the pictures below you can see the "jig" I set up to allow me to get into the tight spaces inside the elevator skins and match drill the stiffeners.

Stiffener cleco'd on with my improvised hold down device (lead weights in a tray).

The inside of the right elevator skin as I match drill the stiffeners.

The back side of the right elevator skin.  Notice how its all bowed outward?  This is because it was pre-bent at the factory and I have to open it up to work on the inside.